Understanding the Starlink Mini Mount
What is a Starlink Mini Mount?
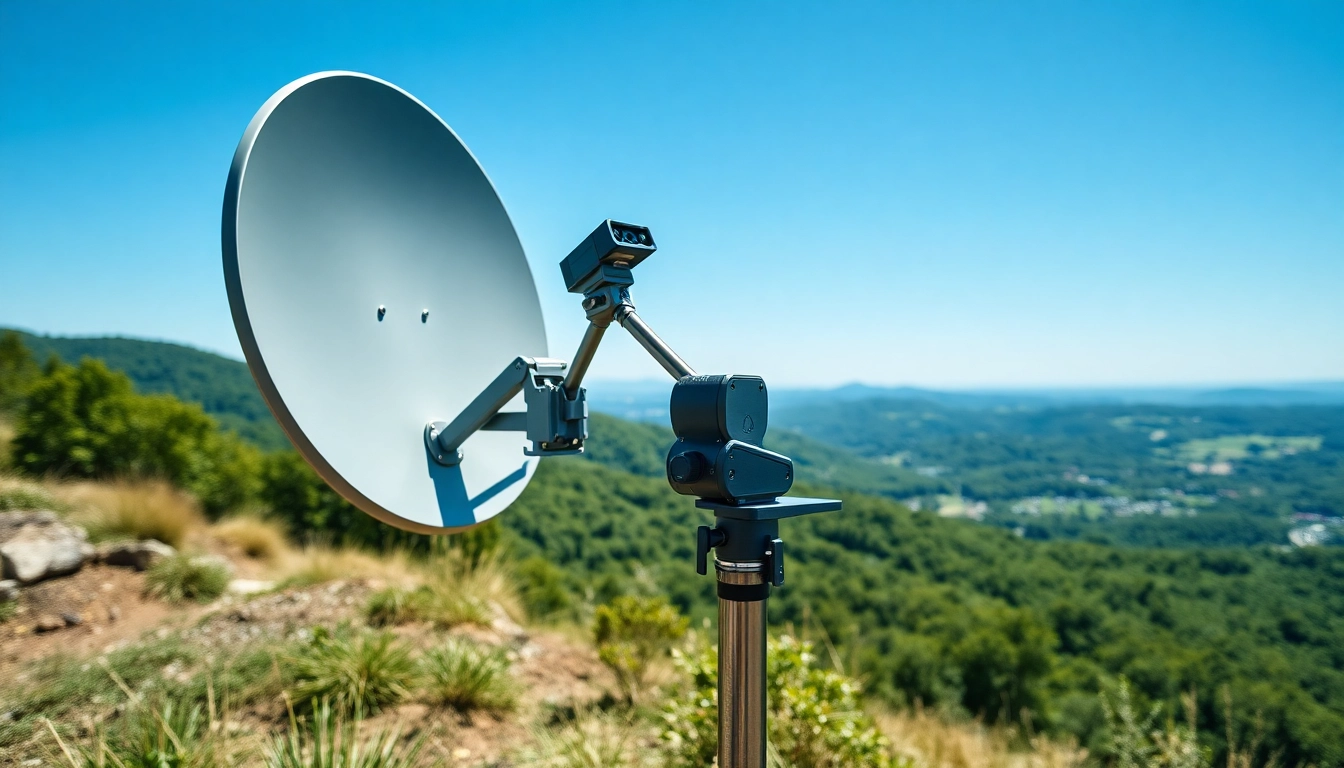
The starlink mini mount serves as a critical support system for satellite dishes designed to enhance connectivity. This mount is engineered specifically for the Starlink Mini satellite dish, which plays a pivotal role in providing high-speed internet access to remote and underserved areas. Its compact structure allows for easy installation and flexibility across various terrains—be it residential roofs, outdoor setups, or temporary setups in RVs. By providing a stable platform, the mount ensures optimal signal reception, enhancing the overall performance of the Starlink system.
Key Features and Benefits
The starlink mini mount comes equipped with a range of features that optimize usability and stability. Key benefits include:
- Durable Construction: Made from high-quality materials to withstand harsh weather conditions, ensuring longevity without compromising performance.
- Easy Installation: Designed for rapid assembly and disassembly, allowing users to set up quickly without specialized tools.
- Versatility: Compatible with various mounting options, including parallel mounts for walls or angled setups for optimal signal reception.
- Aesthetic Appeal: Available in various colors to blend seamlessly with the surroundings, contributing to a cleaner visual appearance.
Common Use Cases
The starlink mini mount is suitable for a variety of scenarios:
- Residential Use: Facilitating high-speed internet access in homes located in rural areas where traditional internet services may not reach.
- Travel and RV Setup: Offering nomadic internet solutions for users needing stable connectivity while traveling.
- Temporary Installations: Recommended for events that require reliable internet access, such as festivals or outdoor gatherings.
- Emergency Response: Used in disaster relief efforts where traditional infrastructure may be destroyed, enabling critical communications to resume.
Installation Guide for Your Starlink Mini Mount
Essential Tools and Equipment Needed
Before embarking on the installation of the starlink mini mount, gather the following tools and equipment:
- Drill with appropriate drill bits
- Screwdriver (torque-rated where applicable)
- Level gauge for alignment
- Measuring tape for precise placement
- Safety gear (gloves, glasses, etc.)
Step-by-Step Installation Instructions
Follow these steps for an efficient installation of the starlink mini mount:
- Select the Location: Choose a spot with a clear line of sight to the sky, avoiding obstructions like trees or buildings.
- Mark the Mounting Points: Use the provided bracket to mark where to drill the holes for mounting. Ensure these points are level.
- Drill the Holes: Carefully drill the holes at the marked points, ensuring not to damage any underlying structures.
- Attach the Mount: Use screws to secure the mount firmly. Ensure it is level using the level gauge.
- Connect the Dish: Attach the Starlink Mini dish to the mounted bracket according to the user manual.
- Test for Signal: Power on the device and check for an optimal signal before finalizing the installation.
Best Practices for Site Selection
Choosing the right installation site can significantly impact the performance of your Starlink setup. Here are best practices:
- Height Matters: Elevate the mount above any potential obstructions. The higher, the better the line of sight to the satellite.
- Clear Path: Ensure no tall trees, buildings, or other structures can block the satellite signal.
- Avoid Metal Interference: Position away from large metal objects that could obstruct the signal or reflect it.
- Weather Considerations: Make sure the site is not prone to heavy snowfall or flooding that could potentially damage the setup.
Performance Optimization Tips
Adjusting Angles for Better Signal Reception
Proper alignment of the starlink mini mount can greatly enhance the signal quality. Here’s how to optimize:
- Azimuth and Elevation: Use a compass to find the most favorable azimuth and elevation angles based on your geographical location.
- Fine-Tuning: Make small adjustments and test the signal strength frequently via the Starlink app to find the perfect alignment.
Understanding Environmental Impacts
Environmental factors can affect the performance of satellite communications. The following are notable considerations:
- Weather Conditions: Rain, snow, or heavy cloud cover may degrade signals. Monitoring local forecasts can help users prepare.
- Temperature Fluctuations: Extreme temperatures can cause materials to expand or contract, which may affect structural integrity.
Regular Maintenance for Longevity
To ensure the longevity of your starlink mini mount, consider these maintenance practices:
- Routine Inspections: Regularly check for loose screws and signs of wear or damage. Tighten any loose parts as necessary.
- Cleaning: Clear debris and dirt from the dish and mount periodically for optimal performance. Avoid using harsh chemicals that may damage the materials.
Troubleshooting Common Issues
Signal Disruptions and Their Solutions
Interference with signal integrity can be frustrating. Here’s how to address common disruptions:
- Missing Signals: Check for obstructions such as new constructions or tree growth. Adjust the mount accordingly.
- Fluctuating Speeds: Test the equipment at different times of the day to determine if this issue correlates with peak usage times.
Physical Damage: How to Assess and Repair
If your starlink mini mount suffers physical damage, take the following steps to assess and repair:
- Visual Inspection: Examine the mount for cracks or dents. Pay attention to the attachment points and material stress.
- Repair Process: If there’s minor damage, it may be possible to repair it with suitable adhesives or screws. For significant damage, consider professional assessment.
When to Replace Your Starlink Mini Mount
It’s essential to know when a replacement is necessary to maintain optimal performance:
- Significant Wear and Tear: If the mount shows extensive damage or rust, it may be time for an upgrade.
- Poor Signal Performance: If you consistently experience poor signals despite adjustments, reassessing mounting equipment is advisable.
Exploring Advanced Configuration Options
Integrating with Additional Accessories
Enhance the capabilities of your starlink mini mount by integrating various accessories:
- Weather Shields: Installing weatherproof shields can protect the dish from extreme environmental conditions.
- Signal Boosters: Use signal boosters to enhance connectivity for multiple devices in large spaces or areas with weak reception.
Settings for Enhanced Performance
Optimize device settings for peak performance. Consider the following:
- Firmware Updates: Regularly check for and install firmware updates to ensure your dish’s software is current.
- Network Configuration: Customize your router settings to prioritize bandwidth for essential applications, enhancing overall connectivity.
Real User Feedback and Insights
User reviews and feedback can provide insights into real-world performance:
- User Experiences: Many users report significant improvement in internet quality after optimizing their setups.
- Community Forums: Engage in online forums to share experiences and gain tips from other Starlink users regarding their mounting setups.


Leave a Reply